
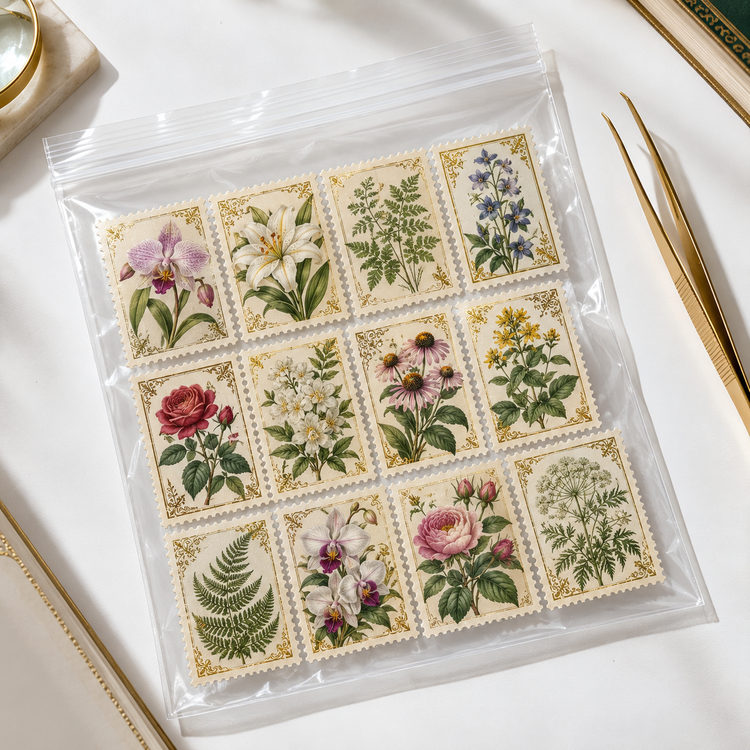
How to Choose Packaging Bags for Stamps
Posted by AppleZipBags Team on Sep 30th 2026
Choosing packaging bags for stamps starts with an important distinction:
The bag used to organize a protected stamp is not necessarily the same enclosure used to preserve the stamp.
Stamps are delicate paper collectibles. Depending on the issue, a stamp may also have:
-
Original gum
-
Pressure-sensitive adhesive
-
Fragile perforations
-
Fugitive ink
-
Embossing
-
Foil
-
Attached selvage
-
A hinge
-
A cancellation
-
A certificate
-
A sensitive or unstable condition
For that reason, valuable stamps should normally be placed in suitable philatelic storage materials before they are placed in a general-purpose resealable bag.
A small resealable bag can then serve as secondary packaging for:
-
Sorting
-
Inventory organization
-
Retail presentation
-
Order picking
-
Customer holds
-
Photography queues
-
Stamp-show preparation
-
Keeping labels and certificates together
-
Separating individual sellable lots
The right packaging bag depends on the complete protected item—not simply the dimensions of the loose stamp.
The most reliable process is:
identify the stamp → choose its primary enclosure → measure the completed package → choose bag size → evaluate thickness → select clear or colored packaging → test the label → choose the quantity
This guide explains every step.
Quick Guide to Choosing Packaging Bags for Stamps
| Stamp Format | Size the Bag To | Main Consideration |
|---|---|---|
| Single used stamp | Stamp mount, stock card or glassine | Perforation protection |
| Single mint stamp | Suitable primary enclosure | Gum and adhesive condition |
| Stamp pair | Complete protected pair | Joined perforations |
| Stamp strip | Full strip plus backing | Length and bending |
| Stamp block | Full block and margins | Flat support |
| Souvenir sheet | Complete protected sheet | Width, height and rigidity |
| Glassine envelope | Complete glassine dimensions | Corner and closure clearance |
| Approval card | Entire card | Avoid bending |
| Stock card | Entire card plus label | Width and height |
| First-day cover | Complete cover and enclosure | Larger format |
| Stamp set | Full arranged set | Keep every stamp together |
| Retail stamp lot | Primary enclosure plus label | Visibility and SKU accuracy |
Step 1: Determine the Purpose of the Bag
Before selecting a size, decide what the bag needs to accomplish.
Possible uses include:
-
Temporary sorting
-
Retail packaging
-
Inventory identification
-
Order fulfillment
-
Shipping organization
-
Estate processing
-
Duplicate storage
-
Research categorization
-
Customer-order separation
-
Coin- or stamp-show preparation
-
Keeping certificates with the correct items
The intended use affects:
-
Size
-
Thickness
-
Color
-
Label design
-
Quantity
-
Whether additional rigid support is required
Temporary Sorting
For temporary sorting, the priorities may be:
-
Easy opening
-
Clear visibility
-
Simple labeling
-
Multiple sizes
-
Smaller purchase quantities
Retail Packaging
For retail packaging, the priorities may include:
-
Professional presentation
-
Accurate SKU information
-
Product visibility
-
Barcode readability
-
Easy customer handling
Order Fulfillment
For fulfillment, the bag should make it easy to verify:
-
Correct stamp
-
Correct country
-
Correct issue
-
Correct condition
-
Correct quantity
-
Correct customer order
Long-Term Preservation
Long-term preservation requires materials selected specifically for the stamp and its condition.
Do not assume a general-purpose resealable bag is automatically:
-
Archival
-
Acid-free
-
Lignin-free
-
Chemically inert
-
Suitable for original gum
-
Suitable for pressure-sensitive adhesive
-
Moisture-controlling
-
Appropriate for permanent direct contact
When preservation is the primary objective, consult accepted philatelic and paper-conservation guidance.
Step 2: Identify the Stamp Format
A “stamp” may describe several physically different products.
Determine whether you are packaging:
-
One loose stamp
-
A mint stamp
-
A used stamp
-
A stamp on piece
-
A pair
-
A strip
-
A block
-
A plate block
-
A souvenir sheet
-
A miniature sheet
-
A coil strip
-
A booklet pane
-
A first-day cover
-
An entire envelope
-
A certified stamp
-
A complete set
-
A dealer lot
-
A packet of duplicates
These formats should not automatically use the same bag.
Single Stamps
Single stamps may be small, but their protective enclosure can be considerably larger than the stamp.
Do not choose the bag using the printed design dimensions alone.
Pairs and Strips
Pairs and strips require space for:
-
Joined perforations
-
Full width or height
-
Attached margins
-
Support material
A tight package can stress the connections between stamps.
Blocks and Plate Blocks
A block may include:
-
Four or more stamps
-
Selvage
-
Plate numbers
-
Inscriptions
-
Marginal markings
Measure the complete block, including every attached margin.
Souvenir and Miniature Sheets
These formats require a larger, flatter package.
Do not:
-
Fold the sheet
-
Curl it
-
Trim the margin
-
Force it into a small bag
-
Allow it to press into the zipper
Covers and Postal History
A first-day cover, postal-history envelope or stamp on cover requires packaging sized to the entire paper artifact.
The stamp may be only one inch wide, but the complete envelope may require a substantially larger enclosure.
Step 3: Select the Primary Stamp Enclosure
Primary protection is the material directly touching or immediately surrounding the stamp.
Examples include:
-
Stamp mount
-
Stockbook
-
Stock card
-
Approval card
-
Glassine envelope
-
Album page
-
Preservation-quality paper enclosure
-
Chemically stable sleeve selected for paper collectibles
The American Philatelic Society’s stamp-storage resource discusses agents that can harm stamp and postal-history collections.
Why the Primary Enclosure Comes First
Suppose a stamp measures approximately one by one-and-a-half inches.
If you select a bag from those dimensions, it may appear that an extremely small bag is appropriate.
But the stamp may later be placed in:
-
A larger glassine envelope
-
A two-inch stock card
-
A dealer approval card
-
A certified holder
-
A mount with backing
The original bag may no longer fit.
Use this order:
-
Identify the stamp.
-
Select its primary protection.
-
Add any backing card.
-
Add the inventory label.
-
Add the certificate or documentation.
-
Measure the complete package.
-
Choose the outer resealable bag.
Common Philatelic Storage Tools
The American Philatelic Society’s overview of stamp-collecting tools identifies albums and stockbooks among the common resources collectors use to organize stamps.
These products perform a different function from an outer resealable bag.
The philatelic enclosure protects and supports the stamp. The outer bag can organize the completed inventory unit.
Step 4: Measure the Complete Stamp Package
The bag should be sized to everything that will be placed inside it.
That may include:
-
Stamp
-
Mount
-
Glassine envelope
-
Stock card
-
Approval card
-
Backing
-
Inventory label
-
Certificate
-
Research note
-
Customer-order slip
Measure:
maximum width × maximum height × maximum depth
Measure Maximum Width
Measure the widest point.
For a:
-
Glassine envelope, measure the entire envelope
-
Stock card, measure edge to edge
-
Stamp strip, measure the full joined strip
-
Souvenir sheet, include every margin
-
Cover, measure the complete envelope
-
Certificate, include it if it will be packaged with the stamp
Measure Maximum Height
Measure from the lowest to the highest point.
Include:
-
Header cards
-
Folded glassine flaps
-
Attached selvage
-
Labels extending beyond cards
-
Certificates
-
Backing boards
Then leave space below the resealable closure.
Measure Maximum Depth
Stamps themselves are thin, but stamp packages can gain depth from:
-
Several glassines
-
Multiple approval cards
-
Stacked stock cards
-
Folded documentation
-
Backing board
-
Several duplicate stamps
-
A thick certificate holder
A bag that looks large enough from the front may be too tight after the complete contents are inserted.
Use the Finished Package
Do not measure an empty card and assume the result will remain the same after:
-
Mounts are attached
-
Stamps are inserted
-
Labels are applied
-
Certificates are added
-
Several items are grouped
Measure and test the actual finished package.
The Apple Zip Bags packaging size guide explains the general importance of measuring the complete item and leaving practical room for sealing and handling.
Step 5: Leave Room for Insertion and Closure
The correct bag should allow the protected stamp to:
-
Enter without force
-
Sit fully below the zipper
-
Remain flat
-
Be removed without scraping
-
Leave room for a label
-
Avoid excessive movement
Do Not Select an Exact Fit
An exact fit may:
-
Bend the stock card
-
Damage glassine corners
-
Press against perforations
-
Curl a souvenir sheet
-
Interfere with closure
-
Slow down packing
-
Make removal difficult
Choose the smallest comfortable fit rather than the smallest theoretical fit.
Check the Bag Opening
A rigid or semi-rigid card may match the bag dimensions but still be difficult to insert.
Test the opening with:
-
The widest card
-
The thickest package
-
The largest label
-
The complete documentation
The package should pass through without bending.
Leave Zipper Clearance
The stamp package should remain below the zipper track.
If the contents:
-
Enter the zipper
-
Block closure
-
Must be pushed downward
-
Cause the top to stretch
move to a larger size.
Avoid Excessively Large Bags
An oversized bag can create:
-
Excess movement
-
Folded film
-
Poor retail presentation
-
Wasted storage space
-
Misaligned labels
-
Difficulty stacking inventory
The goal is compact efficiency without pressure.
Step 6: Choose Bag Size by Stamp Format
Bags for Individual Stamps
A loose individual stamp should normally be placed in a suitable primary enclosure before being placed in a resealable bag.
Choose the outer bag according to the:
-
Mount
-
Glassine
-
Stock card
-
Approval card
not the stamp alone.
Bags for Mint Stamps
Mint stamps require special care because their gum or adhesive can be condition-sensitive.
Avoid:
-
Direct finger contact
-
Exposed adhesive touching the bag
-
Damp environments
-
Pressure from overfilled packaging
-
Labels contacting the stamp
-
Stacking without support
Use a suitable philatelic holder first.
Bags for Used Stamps
Used stamps may be packaged for:
-
Sorting
-
Dealer lots
-
Country packets
-
Thematic packets
-
Duplicate sales
-
Educational collections
Ensure that stamps are completely dry before they are enclosed.
Never seal recently soaked or damp stamps in a bag.
Bags for Stamp Pairs
Measure the complete joined pair.
Allow enough room so that:
-
Perforations do not catch
-
The pair remains flat
-
The connection is not stressed
-
Removal does not require bending
Bags for Strips
Strips require a longer bag or card.
Measure:
-
Full length
-
Full height
-
Attached margin
-
Backing card
Do not fold a strip simply to fit a smaller package.
Bags for Blocks
Blocks may require both more width and more support.
Measure:
-
Entire block
-
Selvage
-
Plate number
-
Inscription
-
Mount
-
Backing
Use a flat, supportive primary enclosure.
Bags for Souvenir Sheets
Souvenir sheets should be kept flat.
If larger dimensions are required, businesses can test formats such as 100-pack large 2.5 mil bags after measuring the complete protected sheet.
An outer flexible bag does not provide rigid structural support. Add an appropriate backing or shipping system where needed.
Bags for Glassine Envelopes
Measure the entire glassine, including its flap.
The outer bag can help keep:
-
Glassine
-
SKU
-
Barcode
-
Price
-
Customer order
together.
Inspect older glassines for:
-
Yellowing
-
Cloudiness
-
Brittleness
-
Tears
-
Moisture damage
-
Staining
A new outer bag does not correct a deteriorated inner enclosure.
Bags for Stock Cards
Size the bag to the complete stock card.
Confirm that:
-
The card stays flat
-
Corners do not catch
-
Stamps remain in position
-
The label fits
-
The barcode scans
Bags for Approval Cards
Approval cards may hold one item or several stamps.
Test the filled card rather than an empty one.
Multiple stamps or mounts can change:
-
Depth
-
Weight
-
Flexibility
-
Surface profile
Bags for Covers
Covers and postal-history items require larger packaging.
Size to:
-
Full envelope
-
Cancellation
-
Attached material
-
Insert
-
Certificate
-
Supporting board
Avoid pressure across fragile folds or seals.
Step 7: Choose Film Thickness
Size and film thickness answer different questions.
Size asks:
Will the protected stamp fit?
Thickness asks:
How substantial should the outer packaging be?
Understanding Mil Thickness
One mil equals:
0.001 inch
Therefore:
| Film Thickness | Measurement |
|---|---|
| 1 mil | 0.001 inch |
| 2 mil | 0.002 inch |
| 2.5 mil | 0.0025 inch |
| 4 mil | 0.004 inch |
Mil does not mean millimeter.
2 Mil Bags
Two-mil bags may work for:
-
Lightweight secondary packaging
-
Limited handling
-
Small glassines
-
Individual stock cards
2.5 Mil Bags
For many everyday stamp-inventory applications, 2.5 mil provides a practical middle ground.
Apple Zip Bags offers 100-pack small 2.5 mil bags that can be used when testing a stamp-packaging format.
Potential uses include:
-
Protected individual stamps
-
Small glassine envelopes
-
Approval cards
-
Retail lots
-
Order-fulfillment units
4 Mil Bags
A heavier film may be useful when:
-
The package is frequently handled
-
Several cards are grouped
-
Repeated reuse is expected
-
A more substantial outer feel is preferred
However, heavier film also adds:
-
Cost
-
Material
-
Storage bulk
-
Reduced flexibility
Thickness Does Not Determine Archival Safety
A thicker bag is not automatically:
-
Archival
-
Acid-free
-
Chemically inert
-
Safe for stamp gum
-
Moisture-proof
-
Suitable for direct long-term contact
-
Better for every application
Material composition and intended use must be evaluated separately.
Step 8: Choose Clear or Colored Packaging
For most stamp applications, clear bags are the most versatile option.
Advantages of Clear Bags
Clear bags allow users to see:
-
Stamp design
-
Country
-
Denomination
-
Cancellation
-
Condition
-
Set arrangement
-
Glassine label
-
Stock-card information
without opening the package.
This supports:
-
Inventory verification
-
Retail presentation
-
Order picking
-
Quality control
-
Photography preparation
When Colored Bags Help
Colored packaging may support:
-
Country categories
-
Workflow status
-
Consignment identification
-
Customer holds
-
Sales channels
-
Research queues
Example:
| Color | Status |
|---|---|
| Clear | Newly received |
| Yellow | Research required |
| Orange | Ready for photography |
| Blue | Ready to list |
| Green | Listed |
| Red | Sold |
| Purple | Consignment |
Clear Bag With Colored Label
For many operations, the best system is:
clear bag + colored written label
This provides:
-
Product visibility
-
Category coding
-
Written status
-
Fewer bag SKUs
-
Easier standardization
Color should never be the only identifier.
Step 9: Plan the Label
A bag can fit perfectly and still fail if its label does not work.
Possible Label Information
A stamp label may include:
-
SKU
-
Country
-
Year
-
Issue
-
Denomination
-
Subject
-
Catalog number
-
Mint or used status
-
Hinged status
-
Condition notes
-
Quantity
-
Price
-
Lot number
-
Barcode
-
Storage location
Keep the Stamp Visible
Position the label so it does not cover:
-
Design
-
Denomination
-
Cancellation
-
Margins
-
Perforations
-
Certificate number
-
Important stock-card notes
Keep Adhesive Away From the Stamp
Do not allow an adhesive label to contact:
-
Stamp
-
Gum
-
Selvage
-
Cover
-
Certificate
Apply labels only to suitable outer packaging or inventory cards.
Test Barcode Scanning
Scan the barcode after:
-
The bag is filled
-
The label is applied
-
The package is stored
-
Normal lighting is used
Glare, curvature and folds can affect readability.
Step 10: Consider Stamp Condition
Packaging should reflect the stamp’s actual condition.
Inspect for:
-
Missing perforations
-
Short perforations
-
Tears
-
Thins
-
Creases
-
Stains
-
Fading
-
Hinge remnants
-
Disturbed gum
-
Toning
-
Foxing
-
Mold
-
Adhesive exposure
Fragile Stamps Need Support
A fragile stamp may need:
-
Individual separation
-
A stable mount
-
Flat backing
-
Minimal handling
-
Professional evaluation
A thicker outer bag does not repair or stabilize damaged paper.
Damp or Moldy Stamps
Do not place damp or mold-affected stamps into sealed packaging with unaffected inventory.
The Library of Congress paper-care guidance emphasizes cool, relatively dry, clean and stable storage conditions for paper materials.
If valuable material has active mold or water damage, consult a paper conservator.
Step 11: Control Light, Temperature and Humidity
The bag is only one element of stamp care.
Paper, inks, gum and adhesives can be affected by environmental conditions.
Light
Prolonged light exposure can contribute to:
-
Fading
-
Paper discoloration
-
Ink change
-
Loss of contrast
The Library of Congress guidance on limiting light damage explains why light exposure should be minimized for paper-based collection materials.
Clear packaging supports visibility but does not protect stamps from continuous light.
Store valuable stamps away from:
-
Direct sunlight
-
Bright windows
-
Strong display lights
-
Heat-producing lamps
Temperature
Avoid storage in:
-
Hot attics
-
Vehicles
-
Garages
-
Areas near heaters
-
Locations with rapid temperature changes
Humidity
High humidity can contribute to:
-
Mold
-
Sticking
-
Gum disturbance
-
Paper distortion
-
Adhesive changes
Extremely dry or unstable environments can also affect paper.
The Northeast Document Conservation Center’s environmental guidelines explain how temperature, relative humidity, light and air quality influence collection materials.
A Resealable Bag Is Not Environmental Control
Do not assume the zipper makes the package:
-
Airtight
-
Waterproof
-
Humidity-controlled
-
Hermetically sealed
-
Safe from condensation
The room, cabinet, box and primary enclosure remain important.
Step 12: Choose 100 or 1,000 Bags
Do not buy in bulk until the specification is proven.
Start With 100 When:
-
Testing a new size
-
Testing glassines
-
Testing stock cards
-
Packaging a new stamp format
-
Designing a label
-
Comparing clear and colored bags
-
Working with low monthly volume
-
Organizing a limited estate
-
Preparing for one event
-
Establishing a new workflow
A smaller quantity preserves flexibility.
Test Representative Items
Test:
-
Smallest stamp package
-
Largest stamp package
-
Longest strip
-
Largest block
-
Thickest stock card
-
Largest glassine
-
Souvenir sheet
-
Actual label
-
Barcode
-
Storage box
-
Shipping workflow
Move to 1,000 When:
-
The size is proven
-
Several SKUs share the bag
-
Monthly usage is stable
-
Label placement works
-
Barcodes scan
-
The package fits storage bins
-
Employees understand the specification
-
Reordering smaller packs has become frequent
For established recurring needs, 1,000-pack small 2.5 mil bags may be considered after the size has been tested.
Calculate Usage
Use:
monthly packaged stamp lots × bags per lot = monthly bag usage
Example:
-
500 lots per month
-
One bag per lot
Monthly consumption:
500 bags
A 1,000-pack provides approximately two months of supply before accounting for waste or seasonal demand.
Step 13: Standardize Core Bag Sizes
Most stamp businesses do not need a separate bag for every stamp issue.
Instead, create several packaging families.
Extra Small
Potential uses:
-
Single protected stamps
-
Compact mounts
-
Small glassines
Small
Potential uses:
-
Pairs
-
Small sets
-
Approval cards
-
Standard glassines
Medium
Potential uses:
-
Blocks
-
Strips
-
Stock cards
-
Larger sets
Large
Potential uses:
-
Souvenir sheets
-
Miniature sheets
-
Covers
-
Certificates
Create an Internal Specification
Record:
-
Bag dimensions
-
Film thickness
-
Color
-
Approved uses
-
Label size
-
Purchase quantity
-
Storage location
-
Reorder point
This reduces employee guesswork.
Packaging Stamps for Retail Sales
Retail packaging should support:
-
Product visibility
-
Accurate descriptions
-
Price labeling
-
Easy handling
-
Professional presentation
Describe the Stamp Accurately
Do not claim that a stamp is:
-
Mint
-
Never hinged
-
Original gum
-
Fault-free
-
Rare
-
Expertized
-
Certified
unless the description is accurate and supportable.
Keep Sets Complete
When packaging a set:
-
Confirm every stamp is present
-
Keep the set arrangement consistent
-
Use one clear inventory label
-
Prevent stamps from shifting
-
Verify the SKU before display
Limit Display Exposure
Even when clear packaging is useful for sales, do not leave valuable stamps in direct sunlight.
Rotate display material when appropriate and use low-light storage outside selling hours.
Packaging Stamps for Shipping
A resealable bag can organize an order, but it is not complete shipping protection.
Add Structural Support
Shipping may require:
-
Stiff backing
-
Protective sleeve
-
Rigid mailer
-
Appropriate envelope
-
Box
-
Moisture-resistant outer layer
-
Tracking
-
Insurance
Prevent Movement
The stamp should not slide loosely inside a large package.
Use a suitable:
-
Mount
-
Card
-
Glassine
-
Sleeve
-
Backing
Protect the Corners
Approval cards, stock cards and covers can be damaged when corners move inside a mailer.
Size and immobilize the package appropriately.
Separate Multiple Lots
When mailing several stamp lots:
-
Protect each lot appropriately.
-
Label each outer bag.
-
Verify every SKU.
-
Prevent cards from rubbing or bending.
-
Use a supported outer mailer.
Packaging Inherited Stamp Collections
Inherited collections may include:
-
Albums
-
Stockbooks
-
Glassines
-
Loose stamps
-
Covers
-
Certificates
-
Dealer cards
-
Unidentified material
Do not immediately remove every stamp from its existing enclosure.
The American Philatelic Society’s guidance for an inherited stamp collection advises against storing collections in attics or basements and provides direction for evaluating inherited material.
Preserve Existing Organization
Before repackaging:
-
Photograph album pages
-
Record labels
-
Keep sets together
-
Retain certificates
-
Preserve provenance
-
Avoid discarding annotations
-
Separate visibly damp or moldy materials
A resealable bag can help group related information after the collection has been assessed.
Common Mistakes When Choosing Stamp Bags
Choosing the Bag Before the Primary Enclosure
Select the mount, glassine or stock card first.
Measuring Only the Stamp
Measure the complete protected package.
Ignoring Perforations
Leave room so perforations do not catch or bend.
Folding a Strip or Sheet
Use a larger bag and appropriate support.
Packaging Damp Stamps
Allow material to dry fully and address any moisture problem.
Using an Exact Fit
Leave insertion and zipper clearance.
Assuming Clear Means Archival
Transparency does not establish preservation quality.
Assuming Thick Means Chemically Stable
Thickness and material suitability are different.
Assuming Resealable Means Airtight
Avoid unsupported moisture-protection claims.
Applying Labels to Stamps
Keep adhesive on the outer bag or inventory card.
Exposing Clear Bags to Bright Light
Store valuable stamps in dark or low-light conditions.
Overfilling Bags
Avoid pressure, shifting and disorganization.
Buying 1,000 Before Testing
Validate the complete workflow first.
Using a Flexible Bag as Shipping Support
Add rigid backing where necessary.
Discarding Original Documentation
Keep certificates and provenance information with the correct item.
Stamp Packaging Checklist
Before ordering bags, confirm:
-
What stamp format is being packaged?
-
Is it mint or used?
-
Does it have original gum?
-
Is it self-adhesive?
-
Is it a single, pair, strip, block or sheet?
-
Is the stamp completely dry?
-
Does it have suitable primary protection?
-
Is direct-contact material appropriate?
-
What is the complete package width?
-
What is the complete package height?
-
What is the complete package depth?
-
Does the package pass through the opening?
-
Is there room below the zipper?
-
Can the contents remain flat?
-
Are perforations protected?
-
Is the bag unnecessarily large?
-
Is the thickness appropriate?
-
Should the bag be clear?
-
Would colored labels improve organization?
-
Does the label fit?
-
Does the stamp remain visible?
-
Does the barcode scan?
-
Is adhesive kept away from the stamp?
-
Does the package fit the storage box?
-
Is the environment cool and stable?
-
Is humidity controlled?
-
Is light exposure limited?
-
Is separate shipping protection planned?
-
Should 100 bags be tested first?
-
Is the specification proven enough for 1,000?
-
Has monthly usage been calculated?
-
Is a reorder point established?
-
Are inherited labels and certificates preserved?
-
Will valuable material be inspected periodically?
Frequently Asked Questions
How do I choose packaging bags for stamps?
Select suitable primary protection first, then measure the entire package.
Choose a bag that provides:
-
Comfortable insertion
-
Closure clearance
-
Flat support
-
Label space
-
Appropriate visibility
What size bag should I use for stamps?
There is no universal size.
Size the bag to the:
-
Mount
-
Glassine
-
Stock card
-
Approval card
-
Souvenir sheet
-
Cover
-
Certificate
rather than the loose stamp alone.
Can stamps be stored directly in resealable bags?
Do not assume a general-purpose resealable bag is appropriate for permanent direct contact with valuable stamps.
Use philatelic mounts, stockbooks, glassines or preservation-quality enclosures as appropriate.
Are 2.5 mil bags good for stamps?
A 2.5 mil bag can be useful as secondary packaging for protected stamps, glassines and inventory cards.
Film thickness does not prove archival quality.
Should stamp bags be clear?
Clear bags are generally the strongest everyday choice because they allow visual identification.
Colored labels can add category or workflow coding.
Can I put several stamps in one bag?
Common duplicates may be grouped inside an appropriate primary enclosure.
Valuable, fragile or condition-sensitive stamps should be separated and supported appropriately.
Can I bag stamps after soaking them?
Only after they are completely dry.
Sealing damp stamps can contribute to sticking, distortion and mold.
Are resealable stamp bags waterproof?
Do not assume an ordinary resealable bag is waterproof, airtight or hermetic unless the product specifically supports that claim.
How should I package a souvenir sheet?
Keep the sheet flat inside a suitable primary enclosure, measure its complete dimensions and select a larger outer bag with comfortable clearance.
Do not fold the sheet.
How should I package a stamp strip?
Support the full strip and use a bag long enough to keep it flat.
Avoid pressure on the joined perforations.
Should I buy 100 or 1,000 stamp bags?
Buy 100 when testing a new format.
Buy 1,000 when:
-
Size is proven
-
Labels work
-
Several SKUs use the bag
-
Monthly demand is predictable
-
Storage space is available
Can I use a resealable bag to ship stamps?
The bag can organize the contents, but use rigid backing or an appropriate mailer to prevent bending and moisture exposure.
Final Recommendation
To choose packaging bags for stamps, begin with the stamp’s preservation needs.
Select the appropriate:
-
Mount
-
Glassine
-
Stock card
-
Approval card
-
Album system
-
Preservation-quality enclosure
Then measure the complete protected package.
For many organizational and retail applications, a clear 2–2.5 mil resealable bag can provide a practical secondary layer that keeps the stamp, label and documentation together.
Customers can compare available formats through the Apple Zip Bags homepage.
The best selection process is:
identify → protect → measure → choose size → choose thickness → label → test → standardize → buy the appropriate quantity
The correct bag should make the stamp easier to organize and verify without being mistaken for a complete archival-storage solution.