
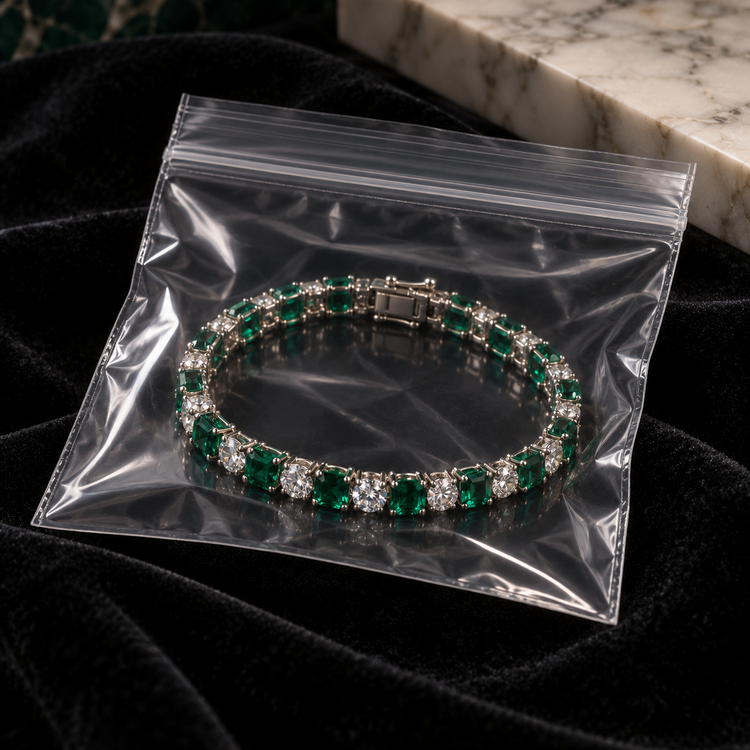
How to Choose Packaging Bags for Bracelets
Posted by AppleZipBags Team on Sep 13th 2026
Choosing the right packaging bags for bracelets is mostly about matching the bag to the bracelet's real packaged shape.
That sounds simple, but bracelet styles vary dramatically.
A delicate chain bracelet may fit into a compact jewelry bag.
A large cuff or rigid bangle may need significantly more space.
A gemstone bracelet may require extra depth because of bead size.
A charm bracelet may need more clearance because charms move independently and create an irregular shape.
The best packaging decision therefore starts with:
the bracelet itself, not the bag.
Apple Zip Bags offers jewelry bags for small jewelry, beads, charms and similar products.
Their jewelry bags are listed at:
2.5 mil thickness
and are available in multiple sizes and colors.
The best choice depends on:
-
Bracelet type
-
Packaged dimensions
-
Bracelet card size
-
Product thickness
-
Charm size
-
Visibility needs
-
Inventory workflow
-
Shipping method
-
Monthly packaging volume
Quick Answer: How Do You Choose Packaging Bags for Bracelets?
Use this process:
-
Identify the bracelet type.
-
Decide how the bracelet will be packaged.
-
Measure the complete packaged item.
-
Allow additional clearance.
-
Check bracelet thickness.
-
Account for cards, charms and beads.
-
Choose clear or colored packaging.
-
Select an appropriate film thickness.
-
Test a smaller quantity first.
-
Move to bulk ordering once the size is proven.
For many everyday bracelet applications:
2.5 mil resealable jewelry bags
provide a practical combination of flexibility, visibility and compact storage.
Step 1: Identify the Bracelet Type
Start by defining what kind of bracelet you are packaging.
Common styles include:
-
Chain bracelets
-
Tennis bracelets
-
Charm bracelets
-
Stretch bracelets
-
Beaded bracelets
-
Gemstone bracelets
-
Pearl bracelets
-
Leather bracelets
-
Cuffs
-
Bangles
Each needs a slightly different packaging approach.
Chain Bracelets
Chain bracelets are flexible and usually easy to package.
They can often be:
-
Laid flat
-
Loosely folded
-
Mounted on a jewelry card
A compact resealable bag can work well.
Tennis Bracelets
Tennis bracelets should not be sharply folded.
They are better arranged:
-
Naturally curved
-
Flat on a card
-
Inside a larger inner package
Premium tennis bracelets may also require additional protective presentation.
Charm Bracelets
Charm bracelets create irregular thickness.
The charms can:
-
Move
-
Catch
-
Press against the bag
-
Tangle with chain sections
Allow more clearance than you would for a simple chain bracelet.
Stretch Bracelets
Stretch bracelets should not be stretched simply to make them fit inside a smaller bag.
Package them in their natural shape.
Beaded Bracelets
Beaded bracelets can be significantly thicker than chain bracelets.
Consider:
-
Bead diameter
-
Bracelet diameter
-
Charm size
-
Elastic thickness
Gemstone Bracelets
Gemstone beads can be:
-
Dense
-
Heavy
-
Irregular
-
Larger than ordinary seed beads
The bag should accommodate both:
diameter and depth.
Bangles
Rigid bangles cannot be folded.
Their full physical diameter matters.
A bag suitable for a chain bracelet may be much too small.
Cuff Bracelets
Cuffs also retain their shape.
Measure them as a rigid object rather than as flexible jewelry.
Step 2: Decide How the Bracelet Will Sit in the Bag
The same bracelet may require different bag sizes depending on the packaging configuration.
Will it be:
-
Loose
-
Folded
-
Mounted on a card
-
Wrapped around an insert
-
Placed inside a pouch first
Measure the final configuration.
Apple Zip Bags' bag size guide recommends measuring the actual item and allowing sufficient room rather than selecting a bag that matches the object's dimensions exactly.
Step 3: Measure the Complete Packaged Bracelet
Measure:
width × height × thickness
of the item as it will actually be packaged.
Do not rely only on:
-
Wrist size
-
Bracelet length
-
Pendant size
-
Bead diameter
Those measurements do not necessarily describe the final package.
Example: Flexible Chain Bracelet
Suppose the bracelet itself is:
7 inches long.
That does not mean you need a:
7-inch bag.
If it is mounted on a:
3 × 4 inch card,
the bag should be selected around:
the carded bracelet.
Example: Rigid Bangle
A rigid bangle measuring approximately:
3 inches across
cannot be folded into a narrow bag.
Its physical diameter determines minimum bag width.
Step 4: Allow Clearance
Do not choose a bag that exactly matches the bracelet or card dimensions.
You need room for:
-
Easy insertion
-
Product thickness
-
Zipper closure
-
Small manufacturing variations
A too-tight package slows fulfillment and increases the chance of:
-
Bent cards
-
Caught charms
-
Stressed seams
-
Difficult sealing
How Much Extra Room Should You Allow?
There is no universal number for every bracelet.
The goal is:
comfortable movement into the bag without excessive empty space.
Test the actual product.
If employees must force the bracelet into the bag:
the bag is too small.
Step 5: Do Not Oversize the Bag Either
A bag that is too large creates different problems.
The bracelet may:
-
Shift
-
Twist
-
Tangle
-
Fold
-
Slide away from the display card
Oversized packaging can also consume unnecessary storage space.
Choose:
comfortable clearance, not maximum room.
Step 6: Account for Bracelet Thickness
Thickness is easy to overlook.
A card may be only:
3 × 4 inches,
but the bracelet itself may project significantly from the card.
Examples include:
-
12 mm gemstone beads
-
Large pearls
-
Heavy charms
-
Layered leather
The bag must accommodate this depth.
Step 7: Account for Charms
Charm bracelets need more room than simple chains.
Large charms may:
-
Catch near the zipper
-
Press against the film
-
Cause uneven packing
Leave enough clearance around them.
Step 8: Consider Bracelet Cards
A bracelet card can improve:
-
Presentation
-
Tangling control
-
SKU labeling
-
Brand consistency
When a card is used:
size the bag to the complete carded bracelet.
Why Cards Help
Cards can keep the bracelet from:
-
Folding
-
Knotting
-
Sliding into a corner
They also provide space for:
-
Logo
-
Barcode
-
SKU
-
Product name
Step 9: Decide Between Clear and Colored Bags
This decision depends on the role of the packaging.
Choose Clear Bags When You Need:
-
Fast visual identification
-
Easy inventory checks
-
SKU verification
-
Wholesale sorting
-
Quality control
-
Product visibility
Clear packaging is usually the most versatile option for everyday operations.
Choose Colored Bags When You Need:
-
Collection coding
-
Seasonal coding
-
Sales-channel separation
-
Privacy
-
Branded presentation
Color should perform a useful function rather than adding complexity.
Simple Color-Coding Example
Clear = regular stock
Blue = wholesale
Pink = limited collection
A simple system is easier to manage than many colors with unclear meanings.
Step 10: Understand Film Thickness
Apple Zip Bags currently lists its jewelry bags at:
2.5 mil.
One mil equals:
0.001 inch.
Therefore:
2.5 mil = 0.0025 inch.
Mil refers to:
material thickness
not the dimensions of the bag.
Is Thicker Better?
Not always.
A thicker bag may provide more material but can also be:
-
Less flexible
-
Bulkier
-
More expensive
-
Harder to store compactly
For many everyday bracelet applications:
2–2.5 mil
is a practical general range.
Step 11: Look for a Resealable Closure
A resealable closure is useful because bracelets may move through several stages:
-
Inventory
-
Photography
-
Quality control
-
Fulfillment
-
Returns
A bag that can be opened and closed repeatedly is convenient for these workflows.
Step 12: Think About Product Visibility
If the bag is used in inventory:
visibility can save time.
Employees can confirm:
-
Bracelet color
-
Charm type
-
Bead style
-
Metal finish
-
SKU card
without reopening the package.
Step 13: Think About Inventory Organization
Packaging can become part of your inventory system.
A simple setup might be:
one bracelet + one bag + one SKU label.
This reduces product mixing.
Shopify's guide to SKU systems explains how structured identifiers can help businesses organize and distinguish inventory.
Step 14: Decide Whether to Package One Bracelet Per Bag
For retail inventory:
one bracelet per bag
is usually the simplest system.
It improves:
-
Separation
-
SKU control
-
Counting
-
Picking
Putting several bracelets in one small bag can increase:
-
Tangling
-
Scratching
-
Confusion
Step 15: Evaluate Sharp Components
Some bracelets contain:
-
Sharp charms
-
Prongs
-
Wire ends
-
Metal corners
Standard flexible packaging may need additional support.
Consider:
-
Backing card
-
Tissue
-
Padding
-
Protective insert
The bag should not be expected to absorb repeated sharp pressure by itself.
Step 16: Choose Packaging for Chain Bracelets
For simple chains:
prioritize:
-
Compact fit
-
Clear visibility
-
Card compatibility
-
Easy closure
A small resealable jewelry bag usually works well.
Step 17: Choose Packaging for Tennis Bracelets
Tennis bracelets should have enough room to sit:
-
Naturally curved
-
Flat
-
Without sharp folds
Use a suitable insert or card if needed.
Step 18: Choose Packaging for Charm Bracelets
Allow extra:
-
Width
-
Depth
-
Clearance
because charms move and add bulk.
Step 19: Choose Packaging for Beaded Bracelets
Measure:
-
Bracelet diameter
-
Bead diameter
-
Charm projection
Large gemstone beads can significantly increase package thickness.
Step 20: Choose Packaging for Stretch Bracelets
The bracelet should remain relaxed.
Do not stretch elastic jewelry to make it fit into undersized packaging.
Step 21: Choose Packaging for Bangles
Rigid bangles require enough width for the full physical shape.
If the bracelet does not flex:
the bag must accommodate the actual diameter.
Step 22: Choose Packaging for Cuffs
Cuffs may require:
-
Wider bags
-
Larger openings
-
More rigid inner support
depending on the design.
Step 23: Consider Clear Bags for Online Stores
For e-commerce businesses, clear packaging can speed up:
-
Picking
-
Quality checks
-
Packing
-
Returns processing
This is especially useful when several bracelet variations look similar.
Step 24: Consider Colored Bags for Internal Coding
Colored bags may help separate:
-
Wholesale inventory
-
Retail inventory
-
Marketplace stock
-
Seasonal collections
Do not use color coding as the only identification system.
Use labels and SKUs too.
Step 25: Choose Bag Size Around the Card, Not Just the Bracelet
If a bracelet is packaged on a:
3 × 4 inch card,
the bag should fit the card comfortably.
The card often determines the minimum:
-
Width
-
Height
while the bracelet determines:
-
Depth
Step 26: Test the Zipper Closure
Once the bracelet is inside:
make sure the zipper closes easily.
The product should not press against the zipper area.
If closure requires force:
try the next larger size.
Step 27: Test Packing Speed
Packaging that technically fits may still be inefficient.
Ask:
Can an employee package the bracelet quickly?
If every bracelet requires:
-
Repositioning
-
Folding
-
Forcing
-
Reopening
the bag may be too small or the packaging method may need improvement.
Step 28: Test Product Removal
The customer or employee should also be able to remove the bracelet without:
-
Pulling hard
-
Snagging charms
-
Bending the card
A good packaging system works in both directions.
Step 29: Test a Small Pack First
For a new bracelet collection:
avoid immediately ordering a very large quantity.
Apple Zip Bags' 100-pack small jewelry bags can be useful for testing:
-
Fit
-
Color
-
Card compatibility
-
Fulfillment speed
before moving to bulk quantities.
Step 30: Move to Bulk Once the Size Is Proven
Once a bag size works consistently:
larger packs can simplify purchasing.
Apple Zip Bags' 1,000-pack small jewelry bags can suit higher-volume businesses with proven packaging needs.
100-Pack vs. 1,000-Pack Bracelet Bags
| Factor | 100-Pack | 1,000-Pack |
|---|---|---|
| Testing a new size | Excellent | Poor |
| Low-volume business | Excellent | Moderate |
| High-volume business | Limited | Excellent |
| Storage required | Low | Higher |
| Risk if size is wrong | Low | Higher |
| Reorder frequency | Higher | Lower |
The safest sequence is:
test first → bulk later.
Step 31: Calculate Monthly Bag Usage
Use:
bracelets packaged per month × bags per bracelet = monthly usage.
Example:
250 bracelets per month × 1 bag =
250 bags per month.
Step 32: Include Extra Packaging Uses
You may also use bags for:
-
Spare charms
-
Extenders
-
Replacement clasps
-
Components
Add these to your estimate.
Example:
250 bracelet bags
40 component bags
Total:
290 bags per month.
Step 33: Keep Safety Stock
Do not allow packaging inventory to reach zero.
Shopify's guide to safety stock and reorder points explains how buffer stock can help businesses absorb demand changes and replenishment delays.
For packaging:
10–25% above expected normal demand can be a practical starting buffer, depending on the business.
Step 34: Standardize Bag Sizes
Too many packaging sizes create:
-
More storage bins
-
More purchasing complexity
-
More picking errors
Many jewelry businesses can simplify around:
three to five core bag sizes.
For example:
Small = rings and tiny earrings
Medium = bracelets
Large = necklaces
The exact system depends on the product catalog.
Step 35: Create Internal Packaging SKUs
As volume grows, packaging can be tracked like inventory.
Example:
BR-BAG-MED-CLR
could mean:
medium clear bracelet bag.
This helps with:
-
Reordering
-
Counting
-
Storage
Step 36: Label Storage Bins
Do not mix visually similar bag sizes in one bin.
Label each bin with:
-
Dimensions
-
Color
-
Intended use
-
Internal SKU
This reduces mistakes.
Step 37: Consider Wholesale Needs
Wholesale orders may consume packaging very quickly.
Example:
One wholesale order = 200 bracelets.
If each bracelet is individually packaged:
200 bags
are used immediately.
Businesses with wholesale customers may need larger safety stock.
Step 38: Consider Seasonal Demand
Bracelet demand can increase around:
-
Valentine's Day
-
Mother's Day
-
Graduation
-
Weddings
-
Holiday gifting
Do not forecast packaging only from slow-season usage.
Step 39: Think About Shipping
A resealable jewelry bag is usually:
inner packaging.
It can organize and separate the bracelet, but additional outer protection may be necessary.
FedEx provides jewelry shipping guidance that emphasizes secure inner and outer packaging.
Step 40: Use Appropriate Outer Protection
Depending on the bracelet, add:
-
Box
-
Padded mailer
-
Pouch
-
Insert
-
Tissue
-
Protective wrap
UPS also provides general packaging guidance for selecting appropriate shipping materials.
Step 41: Do Not Overstate Standard Bag Performance
Standard resealable jewelry bags should not automatically be described as:
-
Waterproof
-
Hermetically sealed
-
Archival
-
Museum-grade
-
Anti-tarnish
unless the specific product is designed and documented for those properties.
For everyday bracelet packaging, focus on supported benefits such as:
-
Organization
-
Visibility
-
Separation
-
Resealable convenience
Step 42: Make Sure Jewelry Claims Remain Accurate
If bracelets are sold according to:
-
Gemstone type
-
Precious-metal content
-
Size
-
Quantity
product representations should be accurate.
The FTC's Jewelry Guides provide guidance on representations made about jewelry products.
Packaging should make identification easier, not introduce confusion between similar products.
Bracelet Packaging Comparison Table
| Bracelet Type | Main Packaging Concern | Recommended Approach |
|---|---|---|
| Chain bracelet | Tangling | Card + compact resealable bag |
| Tennis bracelet | Sharp folding | Natural curve or card |
| Charm bracelet | Irregular thickness | Extra clearance |
| Stretch bracelet | Elastic tension | Package relaxed |
| Beaded bracelet | Bead depth | Allow additional thickness |
| Gemstone bracelet | Weight and depth | Strong fit without compression |
| Bangle | Rigid diameter | Larger bag |
| Cuff | Rigid shape | Wide bag or insert |
| Leather bracelet | Thickness | Allow closure room |
Common Bracelet Packaging Mistakes
Choosing Bags Based on Wrist Size
Measure the packaged bracelet.
Choosing an Exact Fit
Allow clearance.
Using an Oversized Bag
Too much room increases movement.
Forgetting Bracelet Thickness
Depth matters.
Ignoring Charms
Charms create extra bulk.
Ignoring the Display Card
The card may determine bag size.
Folding Rigid Jewelry
Bangles and cuffs should retain their natural shape.
Stretching Elastic Bracelets to Fit
Do not put unnecessary tension on elastic.
Putting Several Bracelets Together
Individual packaging often provides better separation.
Using Too Many Bag Sizes
Standardize where possible.
Using Too Many Colors
Keep coding simple.
Ordering 1,000 Bags Before Testing
Test first.
Choosing Only by Price
Fit and workflow matter more.
Treating the Bag as Complete Shipping Protection
Use appropriate outer packaging.
Calling Standard Bags Waterproof
Avoid unsupported claims.
Bracelet Packaging Bag Checklist
Before ordering, ask:
-
What type of bracelet is this?
-
Is it flexible or rigid?
-
How will it be arranged?
-
Will it use a display card?
-
What is the packaged width?
-
What is the packaged height?
-
What is the packaged thickness?
-
Are there large beads?
-
Are there charms?
-
Are there sharp components?
-
Does the bag provide clearance?
-
Can the zipper close easily?
-
Is the bag unnecessarily large?
-
Can the bracelet be removed easily?
-
Should the bag be clear?
-
Would color coding help?
-
Will SKU labels be applied?
-
Will barcodes remain visible?
-
Is one bracelet per bag appropriate?
-
Is this bag used for inventory?
-
Is it customer-facing?
-
Will it be used for wholesale?
-
How many bags are needed monthly?
-
Is safety stock included?
-
Should I test 100 first?
-
Is the size already proven?
-
Would 1,000 bags make sense?
-
Can I standardize this size with other bracelets?
-
Is additional shipping protection required?
-
Have I avoided unsupported waterproof or archival claims?
Frequently Asked Questions
How do I choose packaging bags for bracelets?
Start by measuring:
the bracelet in its final packaged configuration.
Then consider:
-
Thickness
-
Card size
-
Charm size
-
Visibility
-
Quantity
-
Shipping needs
What size bag should I use for a bracelet?
There is no universal bracelet bag size.
Measure:
width × height × thickness
of the complete packaged item.
Should the bag fit tightly?
No.
Allow enough room for:
-
Easy insertion
-
Bracelet depth
-
Closure
Can bracelet bags be too large?
Yes.
Excess room can increase:
-
Movement
-
Tangling
-
Packaging waste
Should I use clear bags?
Clear is usually the most versatile option for:
-
Inventory
-
Fulfillment
-
Wholesale
Are colored bags useful?
Yes.
They can help with:
-
Collection coding
-
Seasonal organization
-
Sales-channel separation
What thickness works for bracelets?
Apple Zip Bags currently lists its jewelry bags at:
2.5 mil.
This can work well for many everyday bracelet applications.
Does 2.5 mil mean the bag is 2.5 inches?
No.
Mil refers to film thickness.
Should I use a bracelet card?
A card can help:
-
Control tangling
-
Organize the bracelet
-
Display branding
-
Hold SKU labels
How do I package a charm bracelet?
Allow additional room for moving charms and irregular thickness.
How do I package a bangle?
Measure the full rigid diameter and select a bag that fits without forcing it.
How do I package a stretch bracelet?
Keep it in its natural relaxed shape.
Can I package several bracelets together?
You can, but individual bags often provide better:
-
Separation
-
Inventory control
-
Tangling prevention
Should I test bags before buying in bulk?
Yes.
Testing a smaller pack can prevent buying large quantities in an unsuitable size.
When should I buy 1,000 bags?
When:
-
Size is proven
-
Packaging workflow works
-
Monthly usage is predictable
How do I calculate monthly bracelet bag usage?
Use:
bracelets packaged monthly × bags used per bracelet.
Then add extra bags for components and safety stock.
Can resealable bags be used for shipping?
They can function as inner packaging, but additional outer protection may be needed.
Are standard jewelry bags anti-tarnish?
Do not assume so unless the specific product is documented as anti-tarnish.
Are standard resealable bags waterproof?
Do not automatically treat them as waterproof or hermetically sealed.
Final Verdict: How to Choose Packaging Bags for Bracelets
The best packaging bags for bracelets are selected around the:
actual packaged product.
Start with the bracelet type.
Determine whether it is:
-
Flexible
-
Rigid
-
Beaded
-
Charm-heavy
-
Carded
Then measure:
width × height × thickness.
Allow enough clearance for:
-
Easy insertion
-
Product depth
-
Zipper closure
without creating excessive empty space.
For everyday bracelet inventory and fulfillment:
clear resealable jewelry bags
are often the most versatile because they make:
-
Product identification
-
SKU checking
-
Picking
-
Packing
easier.
Colored bags can be valuable when used strategically for:
-
Collection coding
-
Seasonal organization
-
Wholesale separation
If you are testing a new bracelet packaging setup:
start with:
a smaller pack.
Once the:
-
Bag size
-
Card fit
-
Charm clearance
-
Packing speed
-
Inventory workflow
are proven:
move to bulk purchasing.
The strongest selection process is:
identify the bracelet → choose the packaging configuration → measure the complete item → allow clearance → check thickness → account for cards and charms → choose clear or colored → test a small quantity → standardize the size → scale purchasing.
That creates packaging that is compact, easy to use and better suited to both bracelet protection and efficient fulfillment.